Well, 5.3. 2012 was date of another birthday party of my friend. Specifically, the birthday of my classmate Emma. There were everything what´s needed to have a hilarious party - little bit of eat, something to drink but extremly important is to be together on some place where we can lay our feet down :)
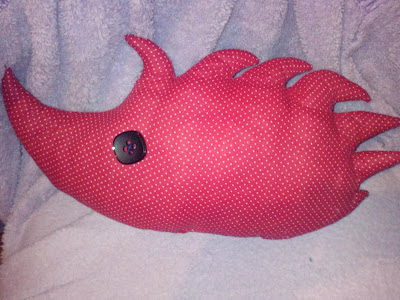
And what it would look like, if I came here with empty hands? So the present I gave her is this:
If you want to know how to do this, or if you want to do something what´s similar than continue reading, I tried to describe the process as best as I could.
You will need:
And what it would look like, if I came here with empty hands? So the present I gave her is this:
You will need:
- fashion fabric (try not to use stretch fabric)
- nice big button (as an eye)
- needle
- sewing machine (if you have this possibility)
- thread in whatever color you want (it won´t be seen), another in color of fashion fabric and finally in color of the button
- pins
- scissors
- padding (I used cotton wool, which can be bought in every store)
- nice music to listen, enough time and patience
To be honest, this is very easy project, the only tedious thing is stuffing :) But I don´t want to discourage you, so let´s start!
For the first, make a model of what you will sew. I had the idea of hedgehog (oh my dog, who invented this word? :) in my head for week, so I couldn´t say no to myself and I decided to make it. Well, I made a very simply model from paper, laid on the back site of two layers of the fashion fabric (right sides together), pinned it to keep it in place and drew a line round the edges.
Then I cut it out. Of course, I cut about 1cm from the drawn edge. After this process, I took the paper model away and pinned this two layers together again. Right sides together!
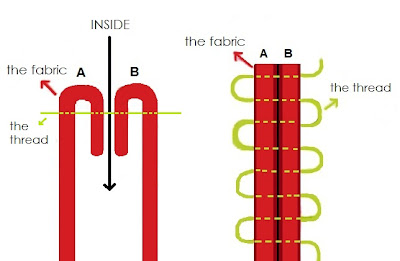
Yet, before I started to sew, I marked where I won´t sew. You need this keep unstitched because this is the place where you going to flip everything inside out through. I also used back stitch at the edges to secure it.
To stitch everything together you can use whatever thread you want, like I said, it won´t be seen.
After sewing, I turned everything inside out and I put black thread on the needle. Our hedgehog deserves to have an eye, although only one, but it does! :) So I sewed it on.
1. prepare your fabric 3. stitch it
2. pin it to keep it in place
↓After this proces, I got this. :) As you can see, it needs something... ehm.. something... it´s too dry, it needs some juice :)
____________________________________________________
So I added this yelow ribbon ... et voilá :)
Well I know that it doesn´t look professionaly but it´s my work, and you know, when you try seriously, when you work hard, when you spend a time and when you gave it "little bit of you", then it is real valuable think :) I know, I still need to learn much, but with every needle play I try, I´m getting better (hope so) and with every bleeding I have from prick my finger, I´m getting stronger, more resistant, because when you learn how to fall, you´ll win against your destiny.


It`s very nice.. But I`m very excited for present from you.. :D hmmm.. But we must wait to my party! :D
OdpovedaťOdstrániťyop :D you must wait.....and I hope it would be worth of waiting :D
Odstrániť